2024-09-27

[SOLVED] Messages app on my iPhone shows more unread messages than I can see


Solution: Ask Siri to read your unread messages.  Siri will read the ones you can't find by scrolling through your conversation list in the app and you can watch the badge count drop with each message read to you.

Thanks to this discussion on Apple's Community.

For months, and across multiple iOS versions, my Messages app was showing 4 unread messages every time I went through and made sure all visibly unread messages were read.  Even selecting to filter on unread message only, the app would show that I had no unread messages, but the badge remained.

I tried:

  • Scrolling through my entire conversation history until I couldn't scroll anymore.
  • Disable the app, power off the phone, reboot, enable the app
  • Disabling and re-enabling notifications
I didn't try a System Reset.

I can't express enough thanks to "Jorph" on the Apple Community for telling me the simple fix to ask Siri to "read my unread messages"!  It was interesting to hear which ones were still counted as unread, and I still don't understand why they were counted in some way as unread, but not showing as such in the app.

If you find yourself in the same boat, try out that workaround and see if it works for you!  If you discovered the reason for the discrepancy, please comment and let us all know what happened.  I hope this helps someone else.


2024-02-15

PYLE PMXU128BT - Play music from laptop using USB out from laptop to USB in on mixer

Make sure the mixer's power is turned on!!!

I connected my laptop to my PYLE PMXU128BT via USB, trying to play music to the mixer from the laptop.  It lit up nicely but showed the "To PC" icon on the display.  No music came out when I slid the MP3 and "MAIN OUT" volume sliders up.  I understood that the mixer should support this but it didn't seem to.

I contacted PYLE support and the friendly agent informed me that the USB port is only one direction, out from the mixer to the PC.

What didn't make sense to me was that my laptop was showing the mixer as the Output Device.

After ending my online chat with PYLE support, it dawned on me that I hadn't turned the power on to the mixer!!!  I realized that if you don't turn the power on, the board will still work in
mixer >> USB >> laptop mode, so the "To PC" icon was correct.

As soon as I turned the mixer's power on, it started playing my music out through the mixer to my sound system!!  So it appears the USB port is bi-directional after all, you just need to make sure that power is flowing through the mixer.

2020-12-12

Use American Express gift card on Amazon

EDIT for Dec 2023 and beyond:
Trying to do an Amazon Reload for the entire amount minus $0.10 got rejected every time, even using lower increments like $100 or $50.

It appears you can process two $25.00 Amazon Reloads in a 24-hour period.  You must run one and wait for it to get to completion (takes around 5 minutes), then try the next one.

A better idea (kudos to my boss for suggesting it) is to take your AMEX gift card to Walmart and purchase an Amazon Gift Card from them for the same amount.  Then you can run one Amazon Reload transaction for the full amount.

2020-03-21

[SOLVED] Remove bad autocomplete suggestion from Google Chrome

At some point we all do it.  In a big hurry to get to a commonly visited website, we quickly start typing the URL into the address bar of Google Chrome, and mistype a part of it before hitting the ENTER key.  Once you realize the mistake, it is too late.  The auto-complete feature of Chrome has already remembered your URL and will now suggest it every time you try to type in the correct URL on future attempts.  It even seems to suggest it before the correct URL that you have previously navigated to in similar fashion; probably because it was entered into the browser more recently.

To solve this:

  • Start typing in the URL into the address bar and watch the autocomplete list come up with the bad URL:

Partially typed URL with bad URL auto-completing
(I typed "tech")

  • Highlight the bad URL by using your arrow keys (see screenshot above).
  • With the bad URL highlighted, hit SHIFT-DELETE.
The bad URL will disappear from the autocomplete list and you can get the URL corrected in the address bar to have it appear going forward when auto-completing.

Happy browsing!

2018-05-18

[SOLVED] Dolby Atmos isn't working with VUDU on my Roku Ultra!

If you are experience audio playback issues with your home theater system while trying to play UHD movies with Dolby Atmos soundtracks through VUDU on your Roku device, but can play other Dolby Atmos movies through other means (like Blu-Rays), try the following:

  • Start at the Roku Home screen
  • Navigate to: Settings | Audio | HDMI and S/PDIF
  • Make sure the setting is "Auto detect" (not one of the other issues that can force formats)
Roku: HDMI and S/PDIF audio setting configured for "Auto detect"
For a detailed explanation of what was happening with my own system when I encountered the issue and how I came to the solution, see my detailed write-up on it.

I hope this helps save someone some time so you can spend it enjoying those amazing Atmos soundtracks!

2017-10-22

[SOLVED] Unable to remote desktop LAN computers after router upgrade

The Fix:

Make your Windows 10 device discoverable (which will convert the network from Public to Private.)

If you were using the computer when the new connection was detected and connected to, Windows 10 should have prompted you when it detected the new network asking if you wanted to make it discoverable.  If you missed that prompt or answered "No" when it asked, you will need to reconfigure that setting.

Steps to fix:

On the machine you want to control, do the following...
  • Hit your "Start" button and type "ethernet"

  • Click on "Change Ethernet settings"
  • On the Ethernet settings view, click the name of the network you need to configure.
    (In my case, it was "Network 11")
  • Toggle the "Make this PC discoverable" switch to "On"
  • Try connecting via Remote Desktop to said machine with another device on your network


Why it Happened:

After upgrading my router tonight, all of my Windows 10 devices detected a new network and automatically decided they would be "Public" and defaulted the device to be undiscoverable.

The problem for me was, one of my devices is a server that has no keyboard or monitor hooked up to it.  I needed to remote in to make sure some services were up and running again.  I had to track down a monitor, DisplayPort-to-HDMI cable and keyboard to be able to access the machine and get it configured so I can remote again.

While frustrating, this is actually a useful feature of Windows 10 to assume that any new network if potentially dangerous and default it to Public.

I hope this helps save someone a few hours of frustration thinking your new router is defective!

2017-03-16

[SOLVED] Change login credentials in Remote Desktop Connection Manager v2.7

I love using Microsoft's Remote Desktop Connection Manager v2.7.  It's a useful tool and I wish it were still being maintained.  There are some funky things with it that keep it from being perfect (what software is?) but this bugger is the hardest for me to remember the workaround.

I had issues trying to get credentials changed in Remote Desktop Connection Manager after my password expired on the servers in a group. I was trying to get to it by doing:

  • Right-click the group name | Select "Properties"
  • Go to Login Credentials
  • You'll see that the options are disabled
SOLUTION:
  • Right click the root node of the left pane | Select "Properties"
  • Click on the "Profile Management" tab
  • Highlight the Profile you need to change | Click the "Edit" button
  • Make the necessary changes and click the "Save" button
  • Click "OK" to get out of the Properties dialog
  • Click "File" | Save or Save All
Hope this helps!  I know I'll need to come back and remember this in 75-90 days when the next password reset comes around.

2015-05-23

[SOLVED] Samsung Data Migration "An error occurred while writing to the Target Disk" 301001

QUICK ANSWER:
Make sure your source drive is Disk 1 and target is Disk 2 (whether that is forced via physical connections or configured in your BIOS) -- please leave feedback if there is a better way to articulate this answer!

Read on below for more details if you need them...

Today I was required to clone a Samsung 840 EVO SSD that has been intermittently failing ever-increasingly in the past couple of weeks.  My new drive is an 850 EVO.

I connected the 850 EVO via a Thermaltake USB 3.0 dock.

The Samsung Data Migration software happily detected both drives (although the software listed my 840 EVO as a "Generic- Compact Flash USB device"), but when I started the clone, after about 8 seconds, the software stopped with the following error:

"An error occurred while writing to the Target Disk"
(with the error code 301001)
Perplexed because it detected the drives fine, I began investigating.

After playing around with a few ideas, I had the thought that maybe it didn't like the fact that I was plugged into an external dock.

Unfortunately I didn't have any extra cables, so I had to unplug a secondary internal drive to be able to plug my 850 EVO in.  This worked like a champ and I'm about 46% finished cloning as I'm writing this.

I began writing this with the intent to tell my readers that you need to plug it in to the internal and not use an external adapter.  However, with further investigation, I discovered the following in Samsung's Data Migration Software manual (English - other languages here) under "Limitations" on page 5 of the PDF:
#5. "On systems with two(2) drives of more (e.g. "C:", "D:", and "E:" drives) with the operating system installed on the "C:" drive, only the first two drives will be cloned.  The "System" partition that is created during Windows installation is automatically replicated.
Now I may have read this incorrectly, but it suggests to me that you need the Source disk as your first HD and the Target as your 2nd (whether that's configured through plugging into the correct ports on your motherboard or set in your BIOS I am not certain at this time) for this to work.

I think it worked for me because I limited myself to the two SATA drives so there would be no confusion (though that only happened because I needed to use the storage drive's SATA cable and power.  LOL

I would love to hear from you if you have had a similar situation... especially if you kept more than two drives connected and/or if you successfully used a USB/SSD dock/adapter.  I would imagine those with thin laptops that can't connect a second drive would need that to work.

I hope this helps save someone some time!

2014-06-26

[SOLVED] Adobe Flash not working on Windows Server 2012 in Internet Explorer

I've been accessing a web site that uses Adobe Flash.  From a Windows 2012 Server using Internet Explorer, however, it always asks me to install Flash.  No matter how many times I install Flash, I'm constantly told that Flash is not installed and prompted to install it again.  The Flash content never displays.

From searching the web, everything I found talked about enabling the "Shockwave Flash Object" under "Manage Add-ons".  However, I never even see the Shockwave Flash Object under Manage Add-ons, regardless of the number of times I've uninstalled and re-installed Flash.

I finally figured out the answer.  By default Windows Server 2012 does not allow you to use "consumer" level features like Flash.  Flash is installed but disabled, and there is no way to enable it without installing the "Desktop Experience" feature.  Servers are intended to use a web browser for setup of the system, but not for consumer level things like Flash.  You have to install the consumer level features on your server.

To fix this, run Server Manager on your Windows Server 2012 machine.  Select Local Server and scroll to the bottom in the “Roles and Features” section.  In the upper right corner select Tasks > Add roles and features.


Press Next through the screens until you get to “Features”.  Scroll down to the bottom and open up “User Interfaces and Infrastructure”.  You will have 2 of 3 installed.  The missing one is “Desktop Experience”.  Check “Desktop Experience” and press Next until you are finished.  Then reboot your server.  Flash should now be enabled, and you will see "Shockwave Flash Object" in the "Manage Add-ons" dialog.


Here is the link where I found the answer:

Hope this helps!

2014-04-13

GoDaddy PHP Upgrade from 5.3.x to 5.4.x Kills Sessions on IIS/Windows

The problem...

I spent a sleepless night on this one, but finally figured it out...

NOTE: This issue should only affect those on the GoDaddy Windows Hosting plan using PHP on IIS, but if I'm mistaken, please post your details and solution [if discovered] in the comments!)

I work on a PHP website that is in the process of being rewritten in ASP.NET MVC.  Because of this, the site has been set up on GoDaddy on a Windows Hosting plan with PHP running under IIS.  All was well through PHP versions 5.2.x and 5.3.x, but tonight needed to upgrade to 5.4 while we wait for the migration to be complete.

The site came up fine until I hit pages that required Session data.  It seemed that Sessions stopped working with my existing code.  After much troubleshooting, I discovered that the sessions were being written on the page setting the data, but when I hit another page that wanted to use said Session data, the Session was blank as if created new.

It turns out that there is a discrepancy on GoDaddy on the session.save_path used for PHP 5.2.x/5.3.x and PHP 5.4.x when hosted on the Windows hosting plan.

session.save_path comparison

PHP 5.2 and 5.3

session.save_path = C:\Windows\Temp\


PHP 5.4

session.save_path = D:\Temp\php\session\

The solution...

Now, I don't know if the directory doesn't exist, or if there aren't proper permissions set on the directory, but for whatever reason, it doesn't like that path.  After reverting back to 5.3.x and discovering the path difference, I re-upgraded to 5.4.x and forced the session.save_path to C:\Windows\Temp\ using a ".user.ini" file in the root of my site on GoDaddy.

What to do...

  • Create/Edit ".user.ini" in the root of your site and make sure it has:
    session.save_path='C:\Windows\Temp\'
  • GoDaddy Control Panel | IIS Management | Recycle App Pool
    (This will ensure the PHP config overrides in ".user.ini" are loaded and used)
  • Enjoy access to $_SESSION again!
I hope this will save someone else a sleepless night.

2013-12-22

[SOLVED] New Media Files Not Showing on DLNA Player From Server

The problem:

When I find cool segments of blu-ray movies or awesome movie trailers I like to show off in my theater room, I have a special place on a computer on my network that I store ripped chapters of the blu-rays or movie trailers.

I love to play them using my Sony BPS-S3100 down in my theater room from said computer on my network.

What stumped me is that, at first, I would add files to the computer, but they wouldn't show up when I would browse the available folders on my blu-ray player.  Old files would show up fine, but the new ones would not.

Thinking it was a caching issue on the side of the blu-ray player, I spent an hour muddling through menus looking for ways to get it to refresh.  I finally found a place in the settings that would allow me to remove my computer from the content server list and re-detect it.  Unfortunately, that didn't solve the issue.

It turns out the issue resides on the computer serving the content.  I assume this information will be relevant to any DLNA server and the clients trying to consume the content.  If not, please leave a comment correcting me where I am mistaken.

(I believe each DLNA server will update media library information automatically on its own schedule, but I have no idea what the schedule is, nor have a desire to wait to have access to my content.)

The solution:

The DLNA server in question must be told to refresh the media library information to apply any changes you have made to your library (whether that is new/modified/deleted files or meta-information stored within the files like ID3 tags, etc.).

I realized I am using Windows Media Player Network Sharing Service.  To force it to update or refresh your media library information, simply click on the "Organize" button in the menu bar, then click "Apply media information changes" (see below.)

The procedure for updating will be different for different types of Media Servers, but if you have found your way to this article and discover the proper way for your DLNA media server to update/refresh your media library information so it can appear on your client, please leave a comment with the steps to do so and I will update this article with the steps for each server.

DLNA Servers & Steps to refresh/update the media library information:

Windows Media Player Network Sharing Service:

  • Open Windows Media Player
  • Click "Organize" >> "Apply media information changes"
    (It will take a little bit of time depending on the hardware in your computer if you need to do the same.)

2012-12-15

Mumble: "Server connection failed: The remote host closed the connection" Possible Cause

I did an extremely newb thing the other day that caused me a night of bewilderment and frustration.

Often times, some of my Friday Night Gamer buddies of mine will play ShootMania during our lunch break at work.  We sometimes communicate on Mumble, an excellent VOIP server made for gamers.

The problem this particular day is, none of the rest of my crew jumped in the server, so I basically ended up only wearing my headset to hear the game sounds.  Those of us in our server happened to all be in the same room on the same LAN, so it didn't matter.

That said, I completely forgot I had connected to Mumble before, so when we stopped our gaming session, I accidentally left Mumble connected.

Fast forward a couple of days, to Friday Night Gaming and it's time for me to get my game on with my buddies.  I connect to my Mumble server from home (with the same account I use at work...)  It connects for about 30 seconds, then kicks me back off, with the error message:

"Server connection failed: The remote host closed the connection"

30 seconds later, it reconnects (Mumble was set to auto-reconnect should it get disconnected.)

After much frustration and realizing that the rest of my crew was having no problem, I gave up and we all moved to our back-up server.  After we finished our gaming session, I was bugged and wanted to discover why this had happened to me.

Like a sunrise, it dawned on me...

"I'm still connected at work... and Mumble there is also configured to reconnect."

I quickly logged on to the VPN and connected to my work machine, saw myself logged in there and disconnected.

I connected from home again and was happily staying connected.

Moral of the story: If you connect to Mumble using multiple computers or devices (they have iOS, Mac OS X and Linux clients too) and you ever encounter this error; make sure you are not connected from another device still; especially with "auto-reconnect" enabled.

I'm sure there are other reasons this error will come up, and I can't help you there.  But if this scenario is a possibility for you, make sure you explore it and correct it as necessary!

2012-04-28

Steam Client and/or Game Update Not Working

Sometimes when Steam downloads an automatic update to a game, the game doesn't work quite right after.

There are many workarounds/solutions to try, but I need to share this particular one I learned, because it may apply to many different Steam games.

In my particular case it was Dungeon Defenders.  Steam downloaded the Eternia Shards Aquanos update, and when I tried to launch the new Aquanos map from the Tavern in a Private game connected to the Trendy network, it would kick me back out to the server list to choose someone else's game to join.

Many people suffered the same fate as discussed on the Steam Forums (where I thankfully found the solution through a combination of posts in the thread there; thanks to all, especially IceArrow and Sylesta at the end of page 3 and 4.)

The steps are as follows (discussed in reference to Dungeon Defenders, since that was my problem; and on Windows since that's what I'm running):

  1. Make sure Steam is closed.
  2. Locate your ClientRegistry.blob file in the Steam installation directory and either rename it to ClientRegistryOld.blob or move it to your recycle bin (in case you need to restore it.)
  3. Launch Steam (which will recreate the ClientRegistry.blob file)
  4. Right-click the game's name in your Steam Library and go to Properties
  5. Click on the "Local Files" tab in the game's properties
  6. Click "Verify Integrity of Game Cache" button
  7. Once the verify finishes, close Steam down entirely.
  8. Relaunch Steam
  9. Launch your game and test the issue again.

Steps are in detail below.  I hope it helps you!

1. Make sure Steam is closed.

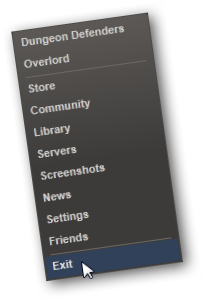
Right-click the Steam icon | Click Exit


2. Locate ClientRegistry.blob and rename it.

Right-click ClientRegistry.blob | Rename to ClientRegistryOld.blob


3. Launch Steam.

Click the Steam icon in your taskbar


4. Bring up the game's properties.

Right-click the game name in your library | Click Properties


5. Click the "Local Files" tab

Click the "LOCAL FILES" tab


6. Click "Verify Integrity of Game Cache"

Click the "VERIFY INTEGRITY OF GAME CACHE" button


7. Close Steam

8. Relaunch Steam

9. Launch your game

Click Play | Good Luck.  Have Fun!


2011-03-13

Windows 7 Activation after Sandy Bridge Recall Motherboard Replacement

Tonight I swapped out my original Sandy Bridge motherboard with one of the "Rev 3" B3 stepping (fixed) versions of the motherboard.  It is an Asus P8P67 Pro.

After not being able to just boot off my Windows drive, I inserted the Windows 7 Professional install CD and ran the repair.  That worked and I was back in business...

... That is, until I brought up my System Properties window using Windows + Pause/Break ... and found that I had 3 days to activate (because Windows had detected the hardware change.)

Trying to activate with via the Internet will bring you an error prompting you to buy a new key or try the automated phone activation service.

Use the automated phone activation service.


It's a pain in the butt because you have to hand enter or speak a bunch of numbers, then listen to and enter a bunch more into your activation dialog, but it works.

The automated system will ask how many computers this copy of Windows has been installed on.  In my case it was the same system; I just swapped the motherboard, so I replied, "One."

It accepted it and gave me my code... seems I'm good now.

I hope the rest of you that have gone through the recall only have to deal with this inconvenience.

2010-12-01

Steam Burnout Paradise - Multiple Owners on One Machine

If you have multiple Steam accounts that own Burnout Paradise on the same computer, and you've discovered you could only tie one EA account to the game and it happened to be tied to the Steam login of the account logged in at the time of the game's installation; here's what you can do to fix it:

Make sure you have the correct CD-key listed in the "Data" column of the "(Default)" string value of the following registry key:
HKEY_LOCAL_MACHINE\SOFTWARE\Electronic Arts\EA Games\Burnout(TM) Paradise The Ultimate Box\ergc

Steam keeps track of all accounts' different Burnout CD Keys, so you're in luck.  The problem is, the game was designed to only be tied to one CD Key, which ties to one EA account.

The game will track different Windows user's progress as far as the single player campaign goes, but to play online and have the EA servers track stuff for you, you have to have the right CD-Key in the registry and the right EA account tied to each CD-Key.

It's a little tricky, but doable.  And for the record, the CD-Key doesn't seem to matter as much once you get the EA accounts tied to the game... As long as the game can login with EA account credentials that have been tied to a Burnout CD-Key, the game seems to work fine.  Please correct me if I'm wrong... your mileage may vary.

Ok, here's the sitch... we're going to do several things:
1. Extract your CD Key branch of the registry out to a file.
2. Make as many copies of the file as there are Steam accounts that own the game on your computer.
3. Tweak each registry file to have one of the Steam account's Burnout CD-Key and rename to identify with the Steam account it belongs to.
4. Create a batch/command file to auto-change the registry with the appropriate CD-Key registry file, then launch Burnout from Steam.
5. Enjoy the game.

1. Extract the Burnout Paradise CD-Key from the registry:
  • Open your registry editor by running "regedit" (32-bit Windows) or "regedt32" (64-bit Windows) to ensure you're in the 32-bit registry.
  • Navigate to: HKEY_LOCAL_MACHINE\SOFTWARE\Electronic Arts\EA Games\Burnout(TM) Paradise The Ultimate Box\ergc
    (This is where the CD-Key is located)
  • Right-click the ergc folder and select "Export"
  • Save to: burnout_cdkey_YourSteamUserName.reg ... replacing "YourSteamUserName" with your real Steam username.
2. Make as many copies of the file as there are Steam accounts that own Burnout on your computer.
  • Rename each to follow the same format as the original export file:
    burnout_cdkey_SteamUserName.reg
Examples: If our Steam usernames are "JohnDoe01" and "CrazyJane42", we would have the following files:
  • burnout_cdkey_johndoe01.reg
  • burnout_cdkey_crazyjane42.reg
3. Tweak each registry file to reflect the appropriate Steam user's Burnout CD-Key.  You can find your CD-Key on Steam's Library page for Burnout (under the "LINKS" section on the right side):
Example of Steam's Burnout Paradise CD key dialog
(Product Code changed to protect the innocent)

  • Click "Copy key to clipboard" and modify the appropriate registry file.  Note: this will require logging into each Steam account separately, going to the Burnout Paradise library screen and bringing up the CD key dialog.
4. Create a batch/command file to auto-change the registry with the appropriate CD-Key registry file, then launch Burnout from Steam.
  • In the folder where you've created the exported .reg files, create a new text file called:
    run_burnout_YourSteamUserName.cmd
  • Edit the new file and put the following in it:
    @echo off
    regedit.exe /s burnout_cdkey_YourSteamUserName.reg
    explorer steam://rungameid/24740
  • Save the file.
  • Create copies of this file and rename them with the appropriate other Steam accounts.
    • Modify each copy and change the .reg line to match the appropriate filename.
5. Enjoy the game.
Ok, so not quite yet... we're not out of the woods until we solve the EA account ties to each CD-Key.  I'm guessing that the first person that logged in and tied the EA account probably told Burnout to auto-login with the same credentials each time.

You should get prompted regardless, since it should detect that the CD-Key has not yet been assigned an EA account.

The way to ensure you get prompted for login credentials is to delete the following file:
%UserDocumentsAndSettingsPath%\Local Settings\Application Data\Criterion Games\Burnout Paradise\Save\AutoLogin.BurnoutParadiseSave
(where %UserDocumentsAndSettingsPath% is the path to your user and Documents and Settings.  This is usually found at:
C:\Documents and Settings\YourUsername (of course, changing the drive letter C: for whatever drive Windows is installed on; and changing "YourUsername" to your real Windows user name.
(Windows Vista and 7 users will need to go to: C:\Users\YourUsername\Local Settings... respectively)

Important note!
This gets you to the point that the next time you launch the game, it will prompt you for credentials.

It is critical that you make sure you launch with the appropriate .cmd file to ensure you tie the right EA accounts to the right CD-Keys.

Once you tie each account, you should be able to run the game normal without worrying about the .cmd or .reg files anymore, but if you should still need them, keep them around.

Please leave feedback with your experiences trying this method, and any comments on how to either:
1) Better explain the process or...
2) Correct any mistakes in my explanations.
Now if I could just figure out how to keep the game from crashing on my laptop anytime the Driver's License stuff shows up. I think I suffer from WebCam glitches I've read about all over the net. *sigh*

Happy gaming!
2010-11-20

Stopping the Malicious Virus That Spams With No Subject Line

Many of you out there have probably been getting hate emails from your friends telling you to quit sending them malicious spam links to sites that offer certain "enhancement" drugs, among other things.  These emails you're purportedly sending have no subject line, and the only part of the body is a URL hyperlink to one of these malicious sites that will then perpetuate the viral love to your friend and their address book... and the vicious cycle continues.

You, at first, had no idea what they were talking about, until you checked your Sent Mail box and saw them sitting there, staring you in the face.

I still don't know what this virus is called, but I've been helping a load of friends who have been suffering its effects.  I helped them get set up with Microsoft's Security Essentials if they didn't already have a current anti-virus application on their computers, and had them ensure the virus definitions were up-to-date.

I had them all do the following:
1. Get their anti-virus software up-to-date on virus definitions.
2. Reboot their computer in Safe Mode and run a FULL virus scan on the entire computer.
3. Run a FULL scan again if a virus was detected and cleaned (to ensure that the next scan comes up clean still. We don't want viruses spawning in other already-scanned areas.)
4. Reboot into Normal Windows mode and run Windows Updates repeatedly until all critical updates have been applied.

Well, that got everyone cleaned up, but the next day more malicious emails were sent from their accounts to their address book still (including to myself.)

Baffled, I started doing more research.  While I still don't know what the virus is called, it became apparent that the malicious user was able to compromise email login credentials (haven't been able to determine through what mechanism yet...) and is now using said credentials to send emails from their own computer(s).

So to complete your eradication of this menace (and thanks to my friend Heather Serr for discovering and confirming this fix):
Immediately log in to your email account and CHANGE YOUR PASSWORD!

That should get you back in good standing with your friends, and leave you with a cleaned computer.

I would appreciate any extra information anyone can give on this situation.  Please leave comments if you know more.

Happy computing!!!

2010-09-09

How Do I Check the Allocation Unit Size of a NTFS partition in Windows?

fsutil fsinfo ntfsinfo [DriveLetter]:
Replace [DriveLetter] with your drive letter.

Example:
fsutil fsinfo ntfsinfo c:


The line item to pay attention to is:
Bytes Per Cluster
(You can divide the number by 1024 to get it's value in K ... Example: 16384 / 1024 = 16K)

Hope this helps someone discover the answer faster than having to read a forum!  :)

2010-07-30

Offline Play Doesn't Work in Starcraft 2

I decided to test the "offline play" feature of Starcraft 2 (for the single player campaign); so I unplugged my network cable and launched the game.

I was met with the "Can't connect to Battle.Net" message and was asked if I wanted to play offline.  I clicked the "Play Offline" button and was taken to the login menu.

When I tried to login with my battle.net account name, I was met with a "You must log in to battle.net first and acitvate your game, then connect at least once with that account..." message.

This made no sense to me, as I'd already connected with the same account on two different computers and had their "cloud" functionality let me continue where I'd left off on the other computer.  So I know the connection they were talking about had already been made.

Turns out there is a defect in the product as of this writing, where you have to click "Play as Guest" while connected to the internet and click to activate one of the Guest accounts first to get offline play enabled (for both Guests and your battle.net account.)

Note, you don't have to actually start the campaign on the Guest account, but simply getting to the in-game menu with that "profile" seems to activate the offline play ability.

So, to get the Starcraft 2 Offline Play enabled for the single player campaign:
  1. Launch Starcraft 2 with a working connection to the internet.
  2. At the login menu, click "Play as Guest"
  3. Click on one of the Guest profiles (I did Guest 1)
  4. Once in the menu that allows you to "Start Campaign", you can exit the game
  5. Disable your internet connection.
  6. Launch Starcraft 2 without internet
  7. Login with your battle.net account or Play as Guest (offline mode should be enabled now)
Now I don't know if you actually have to click into one of the Guest profiles, or if you can simply click "Play as Guest" and be good.  If someone has tried it without actually going into one of the Guest Profiles, please post a comment here to let everyone know.

I still wish Blizzard would give us LAN play without an internet connection... here's to wishful thinking!  It's a killer game otherwise... I'm loving the Single Player campaign.

2010-03-20

How to Find Your TrackMania United Player Key on the Steam Version

Look for the InstallKey=****-****-****-****-*** value in the Nadeo.ini file located in your Steam install folder for TrackMania United.

The stars will be alpha-numeric characters (letters are capitalized/upper-case)

The default installation paths are:
32-bit Windows
C:\Program Files\Steam\steamapps\common\trackmania united\

64-bit Windows
C:\Program Files (x86)\Steam\steamapps\common\trackmania united\

2010-02-18

Google Sync Multiple Calendars on Your iPhone (version 3.0 or later)


Yes, you see it correctly.

Google now allows you to sync multiple calendars to your iPhone or iPod Touch (version 3.0 or later) by creating a CalDAV account.

Not only is it cool because you can have multiple calendars synced, but they're color coded like unto what you see when looking at the calendar in Google's interface through your web browser!

In the picture above, the blue dot represents entries from my scouts calendar; the red is from my personal one.

Don't delay! Go follow the detailed instructions on how to set your iPhone or Touch to sync multiple calendars from Google's help pages...